How to Save For Emergencies: Setting Up An Emergency Fund

Did you know that 1 in 4 Canadians do not have enough money saved to cover a $500 emergency expense?
In this article I will show you how to set up an emergency fund and how to use it, so you’ll be prepared for whatever unexpected financial obstacles life throws at you.
Let’s get started.
What Is an Emergency Fund and Why You Need One
The purpose of an emergency fund
The way life is, the day will come when an unexpected expense comes along and rocks your financial boat. If you’re like most people, you likely won’t have any dedicated money set aside for this unexpected expense, or will have to raid your savings account.
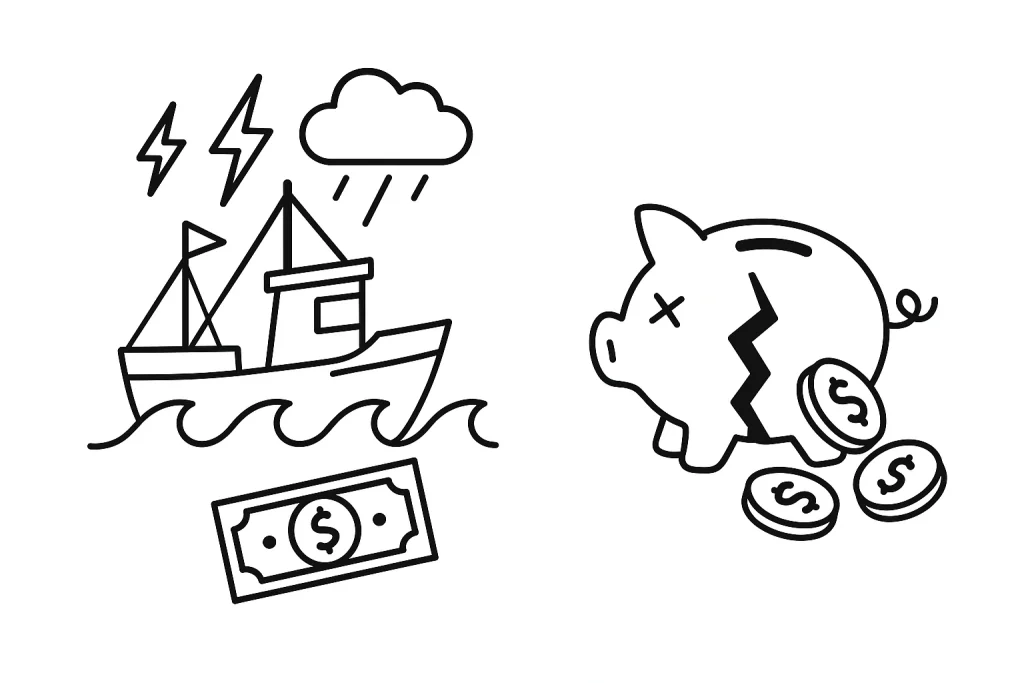
The solution? An emergency fund.
An emergency fund is a key pillar in a smart personal finance plan. The purpose of an emergency fund is to keep a dedicated pool of money set aside specifically for any unexpected expense that you consider an “emergency”.
Common emergency expenses an emergency fund can cover
An emergency fund is meant to help you handle unexpected, urgent expenses such as:
- Job loss or sudden drop in income
- Medical bills (for you, your family, or a pet)
- Car repairs (e.g., accidents or mechanical failure)
- Home repairs (e.g., a leaking roof, pest issues, or broken appliances)
- Funeral costs for a loved one
- Emergency travel expenses
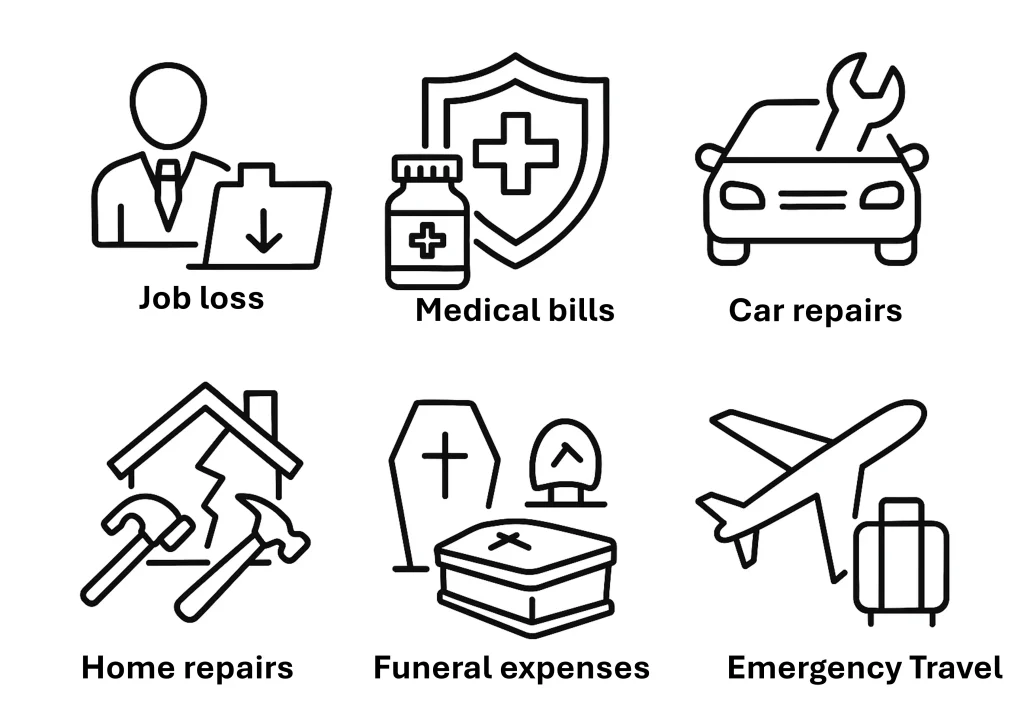
These are true emergencies — not regular, planned expenses like groceries, and not discretionary spending like vacations, concerts, or new electronics.
Emergency fund vs. savings account vs. line of credit
When it comes to covering unexpected expenses, not all financial tools are created equal. Here’s how an emergency fund compares to a regular savings account and a line of credit:
🏦 Emergency fund
- Purpose-built for emergencies like job loss, car repairs, or medical bills
- Held in cash or high-interest savings, easy to access
- No debt or interest to repay — it’s your money
- Provides peace of mind and financial stability
💰Savings account
- A general-purpose account for short-term goals like vacations or a new phone
- Can be used in an emergency, but not ideal if already allocated for other expenses
- May be less liquid if kept in a long-term savings or TFSA
- Not always separated from spending, making it easy to dip into (not what we want)
💳 Line of Credit
- A form of borrowed money with interest
- Useful as a backup option if your emergency fund isn’t enough
- Requires credit approval and can lead to debt spiral if not managed carefully
- Best used as a last resort, not a primary emergency solution
To summarize: Use the emergency fund as your first line of defense. A savings account can support your fund, but should serve planned goals. A line of credit is helpful in a pinch — but only if absolutely necessary.
How Much Should You Save in an Emergency Fund?
General Guidelines & Factors that Affect Your Target Amount
How much you should save in an emergency fund depends on your lifestyle, income stability, and financial responsibilities.
However, here are some widely accepted benchmarks:
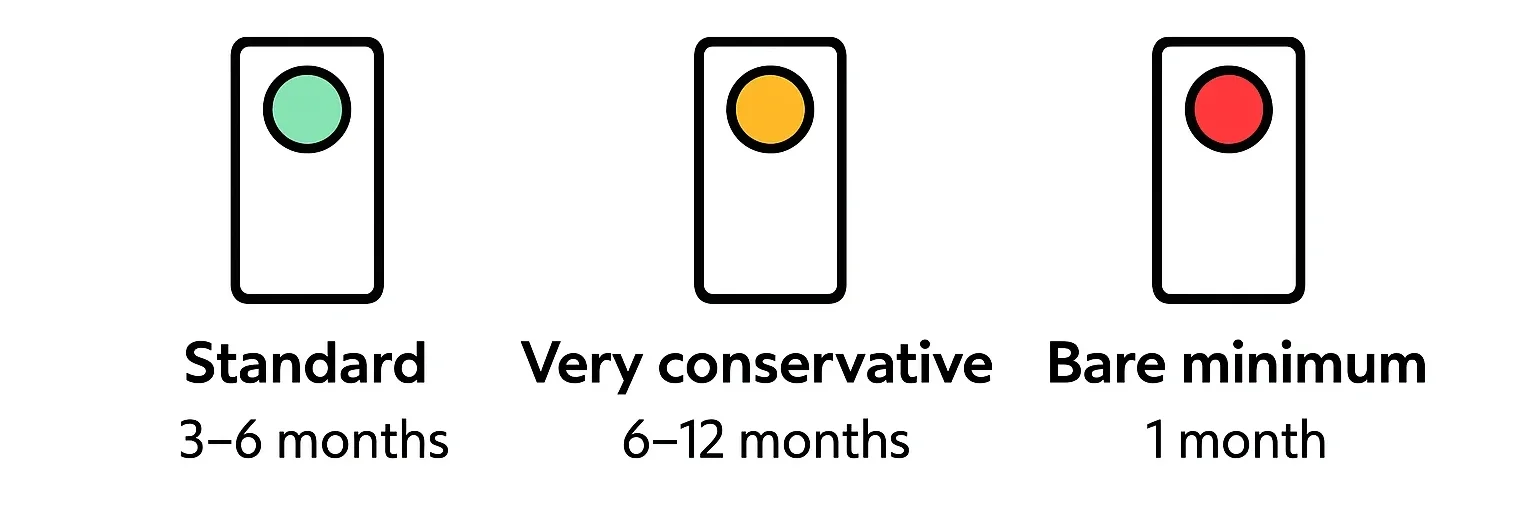
🟢 Standard: 3 to 6 months of essential expenses
- Recommended for most people
- Provides a cushion if you lose your job or face a major expense
- Helps you avoid relying on credit cards or loans
🟡 Very conservative: 6 to 12 months of essential expenses
- Best for self-employed individuals, freelancers, or those with variable income
- Also wise if you have dependents (→ higher expenses), a single income household, or work in a volatile industry
- If you or someone in your family suffers from a chronic disease
- Gives peace of mind during recessions, health crisis, or long job searches
🔴 Bare minimum: 1 month of essential expenses
- A good starting point if you are just beginning
- Covers rent, groceries, utilities, transportation, and minimum debt payments
- Ideal for those with steady income and minimal obligations
- Recommended if you have significant high-interest debt (like credit card debt) that should be paid down aggressively
Pro Tip
Essential expenses are expenses that you must keep paying to survive, keep your home, or stay healthy (e.g., housing, transportation, groceries).
Non-essential expenses are everything else (e.g., subscriptions, vacations, dining out, new electronics).
Canadian-specific considerations
When planning your emergency fund in Canada, it’s important to factor in programs and costs unique to Canadian life.
For example:
- Employment Insurance (EI) can provide temporary income if you lose your job — but there’s a waiting period and the payments may not cover all your expenses.
- While healthcare is publicly funded, not all medical costs are free (e.g. dental, vision, prescriptions, or mental health care may still require out-of-pocket spending).
- Lastly, consider your local cost of living, which can vary significantly between provinces and cities. For example, Toronto or Vancouver require larger emergency cushions than smaller towns or rural areas.
Steps to Start Your Emergency Fund
Building an emergency fund may feel overwhelming, but breaking it down into clear, manageable steps can make it easier.
Here’s how to get started:
Step 1: Calculate your baseline monthly expenses
Start by identifying your essential monthly costs — the bare minimum you need to cover housing, food, utilities, transportation, insurance, and debt payments. These are the expenses your emergency fund must be able to cover in case of a job loss or unexpected financial shock.
Pro Tip
Use your last 1-3 months of bank statements to calculate a realistic average.
Step 2: Set a realistic savings goal
Based on your monthly baseline, decide how many months of coverage you want.
- Most experts recommend 3–6 months (🟢) of essential expenses.
- If your income is unstable or you have dependents, aim for 6–12 months (🟡). Start with a small, achievable target (e.g. $1,000 or 1 month’s expenses) to build momentum, then scale up over time.
Step 3: Choose the right account
Your emergency fund should be safe, accessible, and separate from your daily spending money. The best place to keep it is in a high-interest savings account (HISA) with no fees or withdrawal penalties.
Avoid investing your emergency fund in the stock market — this money isn’t meant to grow aggressively; it’s meant to be ready when you need it.
Step 4: Automate your contributions
Treat your emergency savings like a recurring bill. Set up automatic transfers to your savings account every payday or once a month.
Automation removes the temptation to skip contributions and helps you build your fund consistently — even if you’re starting with small amounts like $25 or $50 a week.
How to Build Your Fund Faster (Even on a Tight Budget)
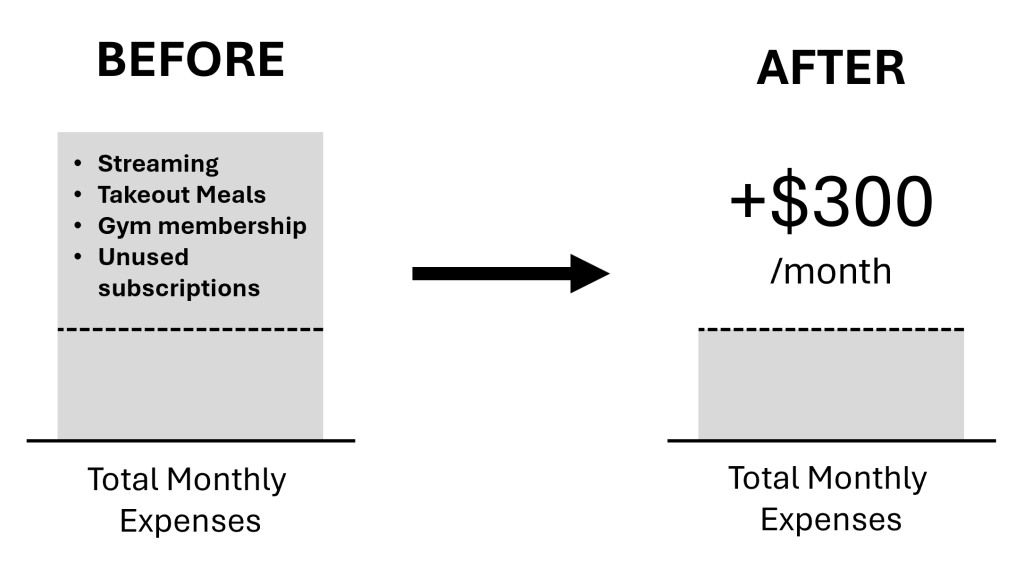
Cut non-essential expenses temporarily
Trim spending to free up cash fast.
Look at your monthly expenses and ask: “What can I pause or cancel temporarily, without significantly affecting my quality of life?”
Common examples:
- Streaming subscriptions you don’t use
- Takeout or Uber Eats habits
- Gym memberships you don’t use
- Unused app or software subscriptions
Even saving just $5 to $10 per day can help you grow your emergency fund by several hundred dollars over a few months.
Use windfalls (e.g. tax refund, bonus)
Instead of using “extra money” for your regular budget, use it to build your emergency cushion. It’s the easiest way to grow your emergency fund instantly.
Examples include a tax refund, work bonus, or a cash gift.
Pro Tip
Save 80%, enjoy 20%. You still treat yourself, but most of the money goes to your savings goal.
Side hustle or extra income ideas
Boost your income without burning out.
While there are plenty of “side hustle” ideas out there, one of the lowest-effort ideas that is suitable for busy Canadian professionals like yourself is selling unused items you already have at home on Facebook Marketplace or Kijiji.
Adding $100-$300/month in side income this way can help you build your fund 2-3x faster while making some room at home.
Where to Keep Your Emergency Fund
When building an emergency fund, where you store the money matters just as much as how much you save. Your fund needs to be safe, quickly accessible, and earning at least some interest — but without putting your capital at risk.
Accessibility vs. growth: striking a balance
Your emergency fund should be liquid enough to access within 1–2 days, but not so accessible that you’re tempted to dip into it for non-emergencies.
Here’s how to strike the right balance:
|
Priority |
What It Means |
Why It Matters |
|---|---|---|
|
Accessibility |
Easily withdrawable without penalty |
Emergencies don’t wait — you need fast access |
|
Growth |
Earn modest interest to offset inflation |
Protects your fund’s value over time |
|
Separation |
Stored apart from daily spending |
Prevents “accidental” usage |
Pro Tip
Use an account that’s accessible online within 24 hours, but separate from your daily chequing to reduce impulse withdrawals.
Best account types in Canada (e.g., HISA, TFSA with HISA, GICs)
When it comes to where to store your emergency fund in Canada, these options offer the best combo of safety, access, and return:
High-Interest Savings Account (HISA)
- Best for: Liquidity + low risk
- Recommended Providers: EQ Bank, Tangerine, Simplii, Alterna Bank
- Interest Rate: ~4–5% (check current promos)
- Why: Instant access, CDIC-insured, no market risk
TFSA with a HISA or GIC
- Best for: Tax-free interest on larger emergency funds
- Setup Tip: Use a TFSA HISA or a cashable GIC inside a TFSA
- Why: Interest grows tax-free, and you keep liquidity (watch withdrawal rules)
Cashable GICs
- Best for: Larger funds you won’t need immediately
- Term: Usually 30-90 days+
- Interest Rate: Slightly higher than HISA (~4–5.5%)
- Catch: Must choose cashable or redeemable to ensure access
Here’s a quick comparison table:
|
Account Type |
Interest Rate |
Accessibility |
Tax-Free? |
Risk |
|---|---|---|---|---|
|
HISA |
4–5% |
Instant |
❌ |
None |
|
TFSA HISA |
4–5% |
Instant |
✅ |
None |
|
Cashable GIC |
4.5–5.5% |
Short delay |
❌/ ✅ |
None |
|
Investment Account |
5-10% |
Delayed |
❌/ ✅ |
🚫High risk |
What to avoid
Some places might seem convenient but are risky or impractical for your emergency savings:
🚫 Stocks or ETFs
- Markets fluctuate — you could lose value when you need the money most
- Selling takes time (2-3 days to settle)
🚫 RRSPs
- Withdrawals are taxed, and you lose that contribution room permanently
- Not ideal for short-term needs
🚫 Regular chequing accounts
- Typically only earn 0–0.05% interest
- Too easy to spend without noticing
🚫 Crypto or speculative assets
- High risk, high volatility — not what you want in an emergency
To summarize: if there’s risk of losing money or penalty for withdrawing, it’s not the right place for an emergency fund.
When and How to Use Your Emergency Fund
Your emergency fund is your financial safety net — it’s there to protect you from life’s unexpected surprises, not convenience spending. Knowing when to use it (and when not to) is critical to preserving its purpose.
What qualifies as a “true emergency”
Not every unexpected bill is an emergency. Here are examples to distinguish between true and no emergencies:
✅ True emergency
- Job loss or major income disruption
- Medical or dental emergencies
- Unexpected car/home repair (urgent & essential)
- Emergency travel (e.g., family crisis)
🚫 Not a true emergency
- Vacations or sales “too good to pass up”
- Home upgrades or non-urgent repairs
- Holiday gifts
- Everyday overspending or cash flow gaps
Pro Tip
Ask yourself: Is this urgent, necessary, and unexpected? If it checks all three boxes, it’s likely a valid use.
Decision checklist before using the fund
Before tapping into your emergency savings, walk through this simple checklist:
Use this checklist to clarify whether to use your emergency fund or not.
Rebuilding it after withdrawal
Used your emergency fund? That’s what it’s there for — but it’s important to refill it again quickly to stay protected.
Steps to rebuild quickly:
Step 1: Pause non-essential spending temporarily
Cut back on dining out, subscriptions, or impulse buys to free up cash quickly. Redirecting even small amounts can help rebuild your emergency fund faster.
Step 2: Set a new short-term savings goal
Aim for a realistic target like $500 or one month of expenses to get momentum. Smaller, achievable goals build confidence and keep you motivated. Aim to rebuild your emergency fund within 3–6 months.
Step 3: Automate small transfers weekly or biweekly
Set up automatic transfers to your emergency fund so you stay consistent without thinking about it. Even $10–$25 per week adds up over time.
Step 4: Use upcoming windfalls
Apply tax refunds, bonuses, or cash gifts directly to your emergency fund. It’s a painless way to make a big dent without changing your routine.
Step 5: Track your progress
Use a budgeting app, savings tracker, or pen and paper to stay aware of your rebuilding progress. Seeing your fund grow reinforces positive habits and helps you stay on track.
Don’t be discouraged if it takes time. Even slow progress rebuilds your peace of mind.
Common Mistakes to Avoid
Using it for non-emergencies
One of the most common mistakes is dipping into your emergency fund for non-urgent expenses like vacations, tech upgrades, or sales you “can’t pass up.” An emergency fund should only be used for true, unexpected needs—like job loss, medical bills, or urgent car repairs.
→ Check out section “What Qualifies as a True Emergency” ←
Mixing it with other savings
Combining your emergency fund with other savings—like vacation money or home renovation funds—makes it easy to overspend or lose track. Keep your emergency fund in a separate, dedicated account so you always know what’s available in a crisis.
→ Check out section “Where to Keep Your Emergency Fund” ←
Not reviewing and adjusting it regularly
Life changes—your emergency fund should too. If you’ve had a major income change, moved, had a child, or added expenses, revisit your fund to ensure it still covers 3–6 months of basic costs.
Pro Tip
📅Set a calendar reminder every 6 months to review your emergency fund. Adjust your savings target based on changes in income, lifestyle, or expenses.
Conclusion
A well-funded emergency fund is your financial safety net—and starting one is easier than you think. Here’s a quick recap of what you need to know:
- 🎯 Set a realistic goal — Aim for 3–6 months of essential expenses
- 🧮 Know your baseline costs — Calculate your true monthly needs
- 🏦 Choose the right account — Use a high-interest savings account (HISA) with easy access
- 🔁 Automate your contributions — Build the habit without thinking about it
- ⚠️ Use it only for real emergencies — Health, housing, and income threats only
- 🚫 Avoid common mistakes — Don’t mix it with other savings or neglect reviews
Starting small is better than waiting. The sooner you take action, the more secure you’ll feel — no matter what life throws your way.